Showing posts with label Blogging. Show all posts

Wednesday, March 09, 2016

Matric Nostalgia and a New Website

A request for a picture of our son’s first day of school came through last week. It’s his Matric farewell dance coming up in April (how did that happen?! Our son is in his final year of school already?!), so we’ve been plunged into a flood of nostalgia going through the ancient archives of pictures on our computers. Sighing and aahing (the kids too not just us!) over how cute they were, little girls in princess dresses, gap-toothed and sparkly eyed, our son dressed as a cowboy, a native American Indian, an army soldier, a pirate, round cheeked with a big smile. Of course we haven’t found a single picture of the first day of school. So he has a choice – in what role does he want to feature at his Matric dance – pirate or Indian, cowboy or army dude?

When I started this blog, coming up for ten years ago, the kids featured a lot – it was never specifically a mommy blog, but they got in on almost every post. Then at some point I felt that it was time to step back a bit and leave them out of the spotlight. The focus shifted to farm life and food, and always our festivals. But I don’t regret a word of those early posts documenting them as small kids – it’s my photo album, my journal, a place where all those funny moments and sayings have been preserved…in lieu of that proper photo album, which I’m always meaning to put together, but haven’t yet achieved.

That nostalgia for past cuteness is a strange thing. I wouldn’t for a minute turn the clock back, as that would mean turning my back on the amazing, interesting individuals they’ve grown into as teenagers, but it’s hard not to feel a little sad that all those baby and little kid days are behind us. Now I know why moms start agitating for grandchildren the minute their kids leave home! Anyway right now we’re in full on teenage mode ever since Youngest turned 13 last year and we went shopping for her first high heels for the Grade 7 farewell. Middle Daughter pointed out that her younger sister got high heels before she did, which didn’t seem right, so she compensated by getting the silveriest strappy high heels possible for the school’s Valentine’s dance. But enough, I said I'd taken the spotlight off them and it’s starting to reflect back in a myriad of highlights from glitter and sparkling nail polish.

My blog has become rather thin on the ground lately, I know. Is anyone still reading this? Anyone? I know Marcheline will stop by sooner or later, and my Mum, but quite understand if everyone else is off reading someone who actually posts more frequently! The reason/excuse is that I’ve been writing so much more for work as a freelance writer over the last couple of years that the last thing I feel like doing on weekends is sitting back down at the computer again.

I’ve been a regular contributor to Neighbourhood, a lifestyle and property supplement in South Africa’s Sunday Times, since it started up in July last year. I’m writing about food: restaurants, cafes, artisan bakeries, chocolate, anything and everything to do with food in the Cape Town area and it’s been great. Sometimes I get to review fine dining restaurants, other times it’s a new deli or café. And then there are interviews with all sorts of new businesses that aren’t food related, or spotlights on a suburb of Cape Town, chatting to residents about what it’s like to live there. I fully intended to write up separate blog posts here to share the experiences… but that’s up there in the realistic stakes with my plan to create a family photo album. But here's the news: my husband has built me a new website as a portfolio for my writing work, and I’ve got a Facebook page to go with it.


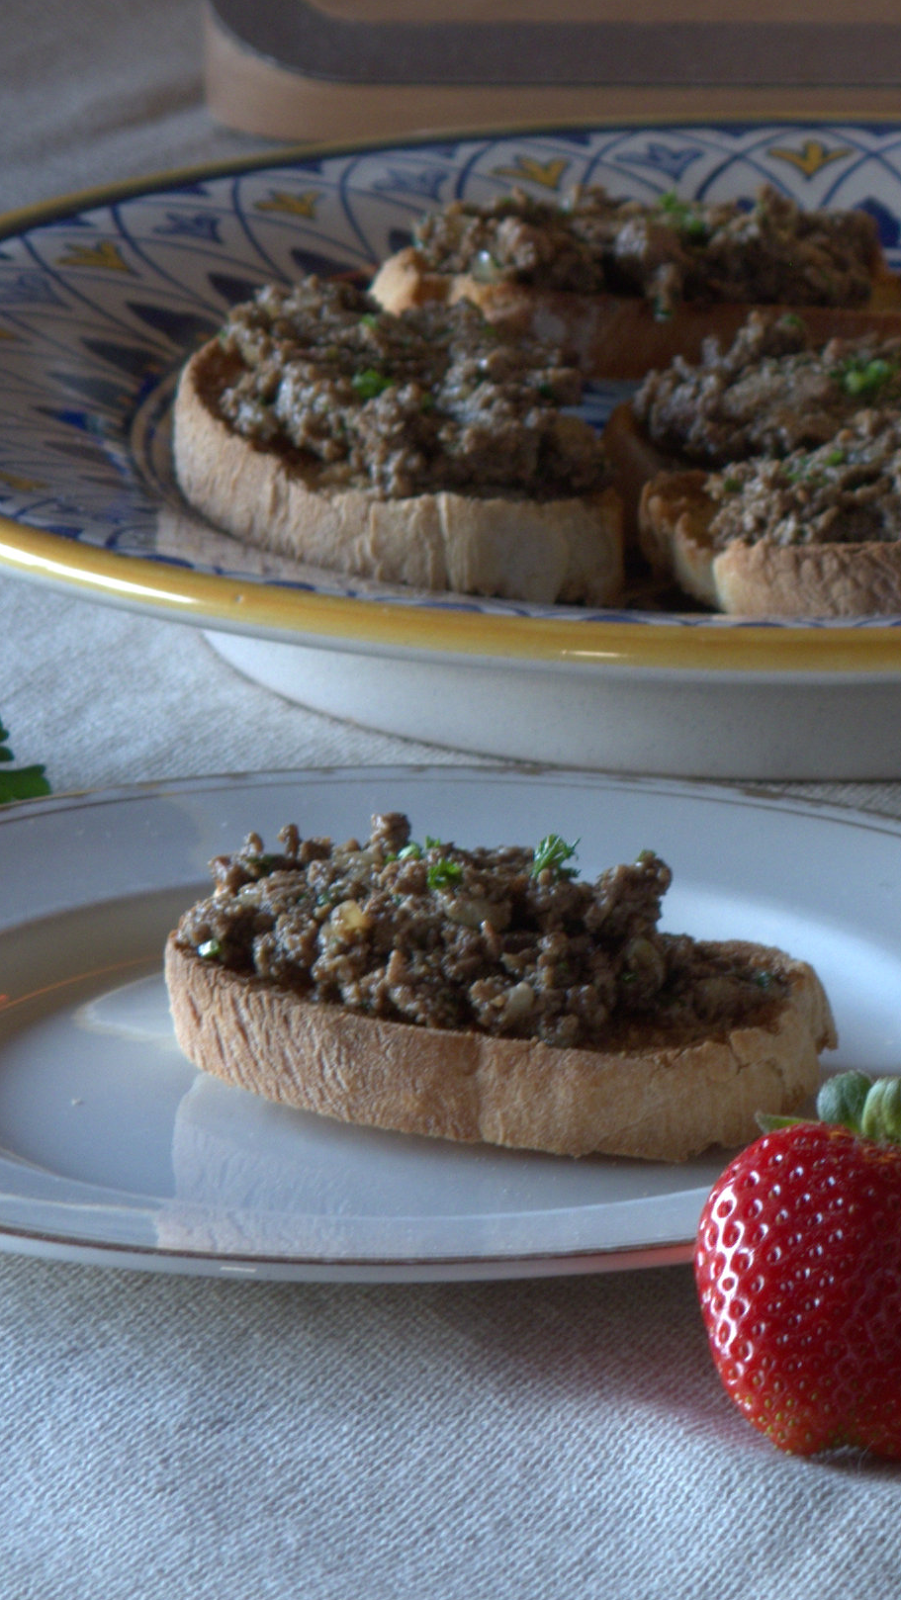
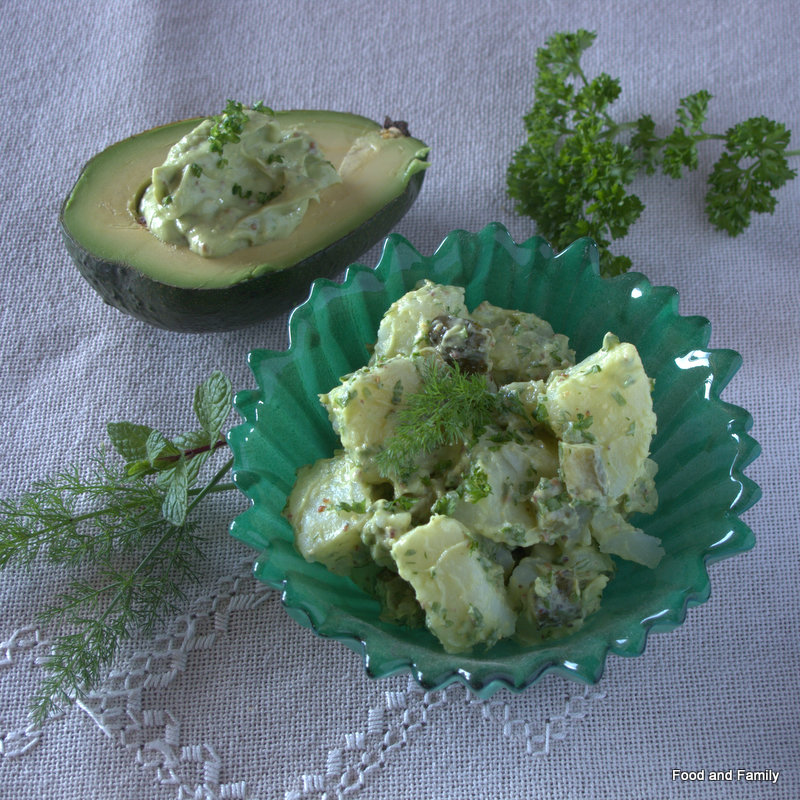
So if there’s nothing new to read here, and you feel like a glimpse of the Cape Town food scene, head over there. Or if it's the farm and family life that you want more of why not go back into my archives and share the retrospective mood that I've been indulging in.

I’ve just been re-reading my blog posts from 2006 (getting diverted from writing this post by all those vivid memories brought back from ten years ago) and I’m feeling slightly damp-eyed and nostalgic all over again. For my kids and all those little details that I would have forgotten if I hadn’t blogged them; for the early days of blogging when it was a whole community thing, when I made new friends, and we commented on each others blogs regularly, some of those friends I’m still in touch with today, some still blogging, others just on Facebook; and for those crazy days of being a full time mother with three small kids.

So a shout out to all those early bloggers of 2006 and to others who started a year or two later like Marcheline of Mental Meatloaf, and who are running with the baton in the true spirit of blogging now that some of us oldies are flagging. And a special mention to Corey of Tongue in Cheek, who started blogging just before I did and who has posted EVERY SINGLE DAY for the last 10 or more years, delighting followers with French brocante, gorgeous pictures and stories of family life in France. I wouldn't be doing what I do today if it hadn't been for my blog and I'd have missed out on knowing some lovely people! I feel like starting a retro blog meme all of a sudden, any takers?!

Tuesday, September 10, 2013

Of Food Blogging and Chocolate Sauce

The rose in my herb garden, just because
Since I was chopped from the Freshly Blogged competition I haven’t posted a recipe here at all. Partly because I relapsed into cooking old favourites after all the adrenaline of coming up with something new and fabulous every single weekend for six weeks. But there is also that element of failing self-confidence that inevitably creeps up on you when you ‘’lose”. Self-doubt – am I really a food blogger? Am I good enough... all that niggling inner voice stuff that is the enemy of creativity. I was starting to second-guess myself – would it be revealing my lack of real food blogger-ness if I shared my latest exciting discovery of a really simple way of making chocolate sauce? Surely I should already have known how to do that if I was worth my Khoisan sea salt?

But then I go back to the basics of what a blog is. It’s a personal space to write about anything in the world you choose. There are no qualifications needed, no job description, no rules. People are free to read or not read.

I take issue with the tweet I read in the course of the Freshly Blogged competition along the lines of “how irritating my friends in the food industry find food bloggers who’ve had no formal training.” How crass, arrogant and just plain stupid. Of course there are food bloggers who are trained chefs. But most of us become food bloggers because we like food. We have other day jobs and write about our kitchen triumphs and disasters for fun.Not all food writers are chefs, not all chefs can write.

The last thing in the world I’d want to do would be to work as a chef – I’d freak out working amid all the stress of a restaurant kitchen. I’d not enjoy catering for 300 people at an event either. But give me a festival with 40 people to make soup, quiche and puddings for and I’m quite happy, or a Sunday roast for 12. I’m a home cook and that’s what I share on my blog.

A blog is about finding your own voice and staying true to it – the minute you try to conform to someone else’s rules or expectations you lose that spark of individuality that is what blogging is all about, on any subject. And to that anonymous tweeter – Nigella Lawson had no formal chef training -  she started out as a writer who loves food, and that is why I love her books, because they are enjoyable to read and written for home cooks, without a soupcon of cheffiness.

I hope that all my fellow honourable society of the Freshly Chopped are emerging from the frenzied whirl of competition and settling back into their own blog pace and rhythm. One of the up-sides of taking part in the competition was the fun of getting to know and chat with many other bloggers, the camaraderie and proof that the world of food blogging doesn’t have to be stabbing everyone else in the back with kitchen knives at dawn, but about friendly support and cheering each other on. And so good luck to the last nine bloggers who have just completed their last challenge of the competition.

And now for that chocolate sauce.


I made profiteroles a few months ago for the first time and was beset by set-backs and hiccups, one of which was my chocolate sauce cooling all lumpy and not sensuously glossy as it should be. I didn’t attempt profiteroles again until last week, because I knew that my dodgy kitchen scales were one reason for the initial choux pastry disaster. But then my birthday brought forth a zooty new set of digital scales, fetched all the way from Yuppiechef by my kind husband. This time with the to- the-last-gram accuracy of my new scales the choux pastry worked perfectly. I made the crème patissiere without any hassle whatsoever. And I went back to basics for the chocolate sauce and it was perfect.

So just in case you haven’t yet got your own favourite way of making chocolate sauce, I’m sharing my not-at-all-secret method. It’s too basic to be a recipe but here we go.


Chocolate sauce
100g of dark chocolate
60 ml water

Over a low heat, melt the chocolate in the water, stirring continuously.

That is it, instant chocolate sauce, as dark and rich as the chocolate you use to make it. (I used half Lindt 70% and half a cheaper non-specific, not quite so dark chocolate).

Allow to cool slightly before pouring over whatever delectable dessert you choose.

And if after a few hours it cools to a semi-solid goo, just add a dash more boiling water, heat a little and stir it back to a sauce consistency.

I had some sauce left over after our profiteroles and it made a wonderful soft chocolate spread to indulge in on crusty white bread.

If you are hankering after a chocolate sauce and don’t have any chocolate in the house, but do have some good cocoa (and let’s face it Nomu cocoa is an indispensable pantry item for any chocoholic), try making my chocolate avo parfait and instead of freezing it, use it as a sauce. It’s different but just as decadently chocolatey!

Sunday, August 11, 2013

Hot Tuscan Crostini or Finely Chopped

If you’ve been following  my blog you may have noticed that I’ve been somewhat caught up in the Freshly Blogged challenge for the last six weeks. Every week a new list of ingredients, every week a shopping treasure hunt to find the requisite ingredients in my local PnP, every week a new recipe to devise, write up and photograph. Well last Monday I got chopped, but I’d already cooked and photographed that week’s challenge. So never one to waste a perfectly good recipe I’m going to share it with you anyway.

My husband says he has his wife back. . I have to admit that it did get to be a rather all-consuming, obsessive, adrenaline rush, waking up on weekend mornings way too early, head buzzing with ideas. In fact it pretty much took over the last six weekends, so now I’m over the initial disappointment and chagrin, it’s quite nice to have an empty weekend stretching ahead. Perhaps a chance to fill those yawningly empty rusk and biscuit tins, to take pictures of the spring flowers, play with the puppy... and chill with the family.

So good luck to everyone else who is busy cooking up a storm for the next round. It has been great getting to know so many of the other food bloggers during the challenge and I’ll be cheering you on from the voting sidelines!

Now for my final recipes. Our challenge was slightly bizarre at first sight. Sponsored by Robertsons, we had cinnamon and cayenne on the list, plus chicken livers, white chocolate and cream. After the initial bewilderment, we read on to see that we had to make two separate dishes, each containing both spices. So a sweet and a savoury both with cayenne and cinnamon. We were allowed three fresh and two grocery ingredients to add to the list.


Predictably many of us were rather suspicious of the chicken livers, never having cooked with them before. But I’d eaten many a chicken liver crostino in Tuscany over the years, and although  that was hardly the most original dish to choose, I reckoned I would go with something that I had a fair chance of convincing my family to eat.

While the traditional Tuscan chicken liver pate is usually flavoured with sage, sometimes with the addition of chopped mushrooms or capers, for the challenge I used the spices we were given instead, together with some parsley, and the combination worked very well, with  the spices complemetning the earthy notes of the livers. Two out of three kids ( you don’t think I’d get our son to even taste these, do you?) really liked them and I’d definitely make them again for an Italian-themed dinner. Because of the challenge, I had to make my own bread from the pantry ingredients, but unless you are already baking a batch of bread I’d recommend just buying a long French loaf. No need to make life harder for yourself unless you want to!

Here is my recipe:


Hot Tuscan Crostini

Chicken livers on the ingredients list took me back twenty years to family trattorias in Tuscany, where one of the classic antipasti was a plate of crostini with a variety of toppings. Rich, deep and earthy, the traditional Tuscan chicken liver paté piled generously on toasted bread is one of those taste memories that remain firmly etched. I wondered if it would be as good with the spicy notes of Robertsons cayenne and cinnamon instead of the more usual sage. It was even better, and two out of three kids  even had seconds.

Crostini toasts

500g bread flour
5g instant yeast
1 tsp salt

Chicken liver paté
4 tablespoons finely chopped onion
2 tablespoons olive oil
3 tablespoons finely chopped parsley
1/8 teaspoon Robertsons cayenne
¾ teaspoon Robertsons cinnamon
250g chicken livers cleaned and roughly chopped
3 tablespoons dry white wine
2 teaspoons flour
1 tablespoon butter
Parsley to garnish

Crostini toasts
Make your own crostini bread (or buy a baguette!). Mix flour and salt. Add yeast. Mix to a dough with about 1 ½ cups of lukewarm water. Knead for 10 minutes. Leave to rise until doubled in size.  Knock down and form into two long thin ‘baguette’ loaves. Leave to rise. Bake at 200C for 20-25 minutes. Cool. Slice into 1 cm slices. Toast under the grill on both sides until golden and crispy.


Chicken Liver Pate
Cook the onion in the olive oil until soft. Add 1 tablespoon of parsley and the spices. Cook stirring for 1 minute. Add the chopped livers. Stir until starting to colour. Add 1 tablespoon wine. Cook stirring for three minutes. Remove from heat. Mince liver to a coarse paste with a chopping knife on a board (a food processor makes it too smooth). Return to pan with 1 tablespoon each of parsley and white wine. Cook stirring for another 2-3 minutes. Moisten again with 1 tablespoon white wine. Add the flour and stir for another minute until flour is cooked and liquid evaporated. Add butter and rest of parsley and stir it in, then remove from heat.


Assemble crostini
Just before serving spread or heap a generous tablespoon of paté onto each toast and garnish with parsley. Can be served hot, warm or room temperature, as a mixed antipasto with other crostini and a few olives.

I will give the recipe for the sweet dish that I made as the other half of the challenge in a separate post...


Look out on Monday for everyone else’s dishes and vote for the one you think looks and sounds most delicious.

Monday, August 05, 2013

Chocolate Pear Tarts with Amarula Ice Cream

After the challenge of cooking with mealie meal and pilchards of the previous two weeks, last week’s Freshly Blogged ingredient list was a joy to read through. Who wouldn’t be happy to cook with Amarula, dark chocolate, almonds  and pears? But in a way this made it all the harder – how to decide on just one dish with so many mouth-watering possibilities beckoning. One proviso was that we had to make a custard as part of the dish. With that thought, my (and many others’) mind turned to ice cream, skipping over profiteroles and upside-down cakes and picturing an exquisite piece of layered French patisserie with a luscious blob of Amarula ice cream.

At this point reality set in. The weekend already involved cooking a Sunday lunch for 12 to celebrate my husband’s birthday and we were spending Saturday out on an excursion to Noordhoek (the other side of the world from us, tucked behind Table Mountain) to meet a puppy that we hoped would be joining the family. I down-scaled my pastry-cook ambitions to something that would fit in with Sunday lunch. It had to be easy and made in advance, as the oven would be groaning with two legs of lamb and trays of roast potatoes. But it also had to be scrumptious and celebratory to fit the birthday occasion.

I had a brainwave – why not make individual versions of this awesome chocolate tart and use the pears in the tart, to create a home-spun pastry re-working of pears in chocolate sauce. In the end I made the ice-cream and the pastry the night before, poached the pears and made the chocolate tarts first thing in the morning and snatched 10 minutes to photograph them for the challenge once the roast was safely into the oven and before our guests arrived.


Both the tarts and the Amarula ice-cream were a big hit, in fact I ‘d go so far as to recommend making a batch or three of the ice-cream to keep in the freezer for emergencies all year round, but especially for Christmas – there is something about its rich creaminess that spells luxury, comfort and sheer deliciousness.

I can hear my non-South African friends screaming at me in frustration, wanting to know what on earth is Amarula? It's a rich creamy liqueur made from the fruit of the Marula tree, nothing like Baileys but with that genre of creaminess and alcoholic kick. Here's Cooksister's explanation of Amarula.

Once again, if you’d like to vote for this recipe in the Freshly Blogged challenge, I’d be very grateful. And go and see what everyone else made – I think there are several more versions of Amarula ice cream to be found out there!

Edited to add: Unfortunately, however lovely I think it is, this recipe wasn't enough to keep me in the competition - I got chopped today along with two others... so you've only got my spice, chicken liver and white chocolate recipes (don't worry, two separate dishes!) to look forward to!

My recipe as posted for the competition:


Chocolate Pear Tarts with Amarula Ice Cream

Chocolate, Amarula, pears and almonds, this week’s ingredients list sent me swirling off in visions of elegant French patisserie... until reality and practicality kicked in. I was already cooking a Sunday lunch for 12 and wanted a delicious dessert that wasn’t too fiddly. Perhaps with a more rustic patisserie feel that wouldn’t demand any last-minute fancy footwork. One which would wow kids and adults without me tearing my hair out just as the guests arrived. I decided to interpret the custard element as a lusciously sophisticated Amarula ice-cream, which I could make in advance. The pears would sit snugly in a bed of rich chocolate individual tarts, with the pear heart shapes adding a quirky touch of visual interest. The toasted almonds scattered on top give an extra textural crunch and contrasting depth of flavour. A definite wow with both kids and adults... one to add to the Christmas dessert list!

Ingredients

Amarula Ice cream
6 egg yolks
100 g caster sugar
250ml milk
250ml cream
200ml Amarula

Easy Sweet Pastry
120g cake flour
30g icing sugar
80g butter
1 egg yolk
Pinch salt
Iced water to mix

Chocolate pear tart
4 pears
1 cup water
80ml white sugar
80g dark chocolate
125ml cream
1 egg beaten
50g blanched almonds


Method
Amarula Ice cream
Beat egg yolks with sugar until pale and fluffy. Heat cream, milk and Amarula, until almost simmering. Do not let boil. Pour cream mixture over eggs, whisking. Put into a double boiler (or a bowl over a simmering pot of water). Cook stirring continuously until the mixture has thickened to a pouring custard. Cool, stirring occasionally to avoid skin forming. Freeze for at least 8 hours. This worked without an ice-cream maker, beating once after 2 hours in the freezer.

Easy Sweet Pastry
Sift together flour and sugar. Add butter cut into small cubes. Chill in freezer for 10 minutes. Beat egg with salt and a little iced water. Put flour and butter into food processor and blitz to breadcrumb consistency. Add egg and blitz. Add just enough iced water to bring together in a soft dough. Wrap pastry and chill for ½ hour. Roll out on floured board to 2mm. Cut 12 circles to fit a muffin tin and line tin with them. No need to blind bake, it works better without.

Chocolate pear tart
Pre-heat oven to 180C.

Peel pears. Cut into quarters and remove cores. (If your pears are very ripe and juicy you won’t need to poach them, so omit next step)

Boil together sugar and water for 2 minutes to make a thin syrup. Put pear quarters in and simmer gently for 5 minutes until starting to soften. Cool in syrup.
Cut each quarter in half and fashion into rough/rustic heart shapes with the outer curve of pear upwards

Break chocolate into small pieces in a bowl. Heat cream to simmering point. Pour over chocolate. Stir until melted and smooth. Stir a little chocolate mixture into egg, then mix egg into the chocolate and stir well.

Put whole almonds into a bag and crush roughly with a rolling pin into uneven pieces and chunks. Toast in the oven for 5 minutes until golden. Cool.


Assemble the tarts
Put a tablespoon of chocolate mixture into base of each tart. Put one piece of pear into each, heart shaped outer curve upwards. Carefully spoon chocolate mixture around pear.  Don’t fill  cases right to top, as pastry shrinks a little as it cooks.
Bake for 20 minutes until pastry is golden and chocolate custard is lightly set. Cool in tin for 2 minutes before removing carefully onto cooling rack.

Serve two tarts with a generous scoop of Amarula ice cream. Sprinkle toasted almonds lavishly over ice cream.

Serves 6
Prep time 1 hour
Total time 8 hours

Please go and see and vote for my recipe here on the Freshly Blogged site. Voting is open until 11am Monday 12th August.


Another extra challenge, for this particular challenge, was resisting the appeal of playing with our new puppy, George, who did decide to come and join our family the day before. We've had him a week now and he's settling in well, playing with Bracken, the kitten and trying to persuade the older dogs to tussle and romp.

Monday, July 29, 2013

Creamy feta fish cakes on buttered cabbage

These pilchard fish cakes were the surprise hit of the Freshly Blogged competition so far with my family. A surprise because I’d never served them pilchards before and never would have thought the kids would eat them. I think the image problem is to do with the name – ‘pilchard’ just doesn’t sound very appetising – it’s not until you realise that they are actually just big sardines that you can start to get enthusiastic about them. Or maybe that’s just me?!

I’d been thinking about making fishcakes recently anyway, but hadn’t got around to it, so this was a great opportunity to experiment. They worked out so beautifully that they are going to be on the family recipe list from now on – a brilliant way of making a meal that tastes luxurious, rich and creamy, but is actually very cheap to make... and it can be one of those emergency store-cupboard meals for those times when you haven’t been shopping for a week and feel like something more than just pasta again.

And cabbage is another humdrum vegetable that too often gets a bad name served boiled into oblivion. Here it is gently braised with butter until soft and sweet with plenty of black pepper as a foil, and it is a whole other food stuff that you might even persuade kids to like!

The challenge ingredients this week were: Lucky Star pilchards, cabbage, brown rice, green beans, feta: They are all quite humble ingredients that conjure up 50s Britain for me, a culinary desert according to many, but also a time of traditional nursery comfort food, which when done well is delicious. Done badly and featuring as school dinners... well that’s another story! Luckily these turned out unlike any school meals that I can remember.
We could add two fresh ingredients (I went for lemon and parsley) and any spices.

Please go and see and vote for my recipe here on the Freshly Blogged site. Voting is open until 11am Monday 5th August.

The recipe and inspiration as posted for the competition follow:

Creamy feta fish cakes on buttered cabbage

Pilchards may be a store-cupboard staple, but too often they sit on the back of the shelf, ignored and waiting in vain for a chance to shine. These fish cakes are that chance, giving them a starring role that will certainly have me buying them regularly now, in fact my husband liked them so much that he insists on it!

The fish cakes are inspired by the best of British comfort food; think of all those once exclusively nursery dishes that have been re-invented as gastro-pub favourites. These are made with rice rather than the more usual mashed potato and flavoured simply with parsley and lemon zest, to complement the richness of the oily fish, a surprise creaminess added by melting feta. Cabbage braised in butter (and oh so sweet) seems to go down well even with kids who don’t usually touch the stuff, and then there is the fresh lemony crispness of a green bean salad to round everything off.

This is an incredibly economical and delicious meal that you could serve up to royalty and make them very happy!


Ingredients
Fish cakes
1 cup PnP brown rice
2 ½ cups vegetable stock
1 tin Lucky Star pilchards in tomato sauce
Zest of 1 large lemon
6 tablespoons finely chopped parsley
100g PnP feta cheese
1 egg, beaten
3 tablespoons flour and more to coat
Salt and pepper
Vegetable oil for frying

Green bean salad
500 g green beans topped, tailed and halved
2-3 tablespoons lemon juice
1 tablespoon finely chopped parsley
50g PnP feta cheese

Buttered cabbage
1 medium  cabbage
30g butter
3 tablespoons water
Salt and pepper

Method
Fish cakes
Cook the rice in the stock in a covered pan, until all the liquid is absorbed and the rice is tender but still retains a slight bite. Spread on a plate to cool.
Break the pilchards into fairly small pieces, removing any spine cartilage as you go. Put aside the excess sauce from the tin.
Break the feta into small pieces.
Once the rice is fairly cool, mix in the lemon zest, parsley, feta and pilchards. Check the seasoning and add salt and pepper to taste.
Add the beaten egg and 3 tablespoons of flour and mix gently. Form the mixture into patties and dip into the extra flour to coat them on both sides. At this stage the patties fall apart very easily so handle them carefully. Makes about  10.
Put the fish cakes in the fridge to firm up until everything else is ready.


Heat enough oil to cover the base of a frying pan. Gently slide in as many cakes as will fit without crowding. Leave to cook for 2-3 minutes until a crust has formed underneath. Turn very carefully and cook on the other side for another 2-3 minutes. Remove onto a warm plate covered with kitchen paper, while you cook the next batch. Serve hot.


Green bean salad
Bring a pot of salted water to the boil. Add the prepared green beans. Cook until al dente, tender enough to bite through but still crisp. Drain and cool under cold tap for a few seconds. Put them in a bowl and sprinkle with lemon juice. Season with salt and pepper. Just before serving add crumbled feta cheese and finely chopped parsley.


Buttered cabbage
Shred the cabbage into fine strips. Put it into a heavy based pot with a lid. Add the water and butter. Season with salt and pepper. Bring to a simmer. Cover and cook for 20-25 minutes, stirring occasionally. During the last five minutes, remove the lid so that the last of the water boils away. The cabbage should be tender and buttery, with no excess liquid.

If you like the sound of this recipe you can vote for it on the Freshly Blogged site until Monday 5th August...thanks so much for your support! xx


Sunday, July 21, 2013

Potato salad with creamy avo-nnaise dressing

It’s only in the last few years that I’ve really started liking potato salad. Up till then I was always put off by the vats of bought mayonnaise too often slicked over it. When I eventually started making my own, I would make the dressing with half and half mayonnaise with yoghurt, and add a good dollop of wholegrain mustard, which to me gave the perfect balance of tanginess.

For ZZ2’s Afrikado "More than just guacamole!" Blogger Challenge, I thought I’d try making a dressing for potato salad that didn’t have any mayonnaise at all. I had a feeling that the avo would provide all the creamy texture needed and the mustard would supply the tang.

I finally tried it today and it worked perfectly. My only worry had been whether the green of the avo would make the salad a bit too, well green. But actually it looked great and tasted even better. My family tell me I can do this one again any time I like!

And the best thing that this is an incredibly healthy dressing for potato salad – no oil, no mayo and, if you want, you can make it dairy-free by leaving out the yoghurt – it still tastes fantastic.

There’s no problem either with the dressing turning colour before you serve it. The lemon juice keeps it fresh for a good few hours, and in fact the small bowl of leftovers is still looking fine this evening!.


Recipe for potato salad with avo-nnaise

For the avo-nnaise
1 ripe avocado
2 teaspoons wholegrain mustard
2 tablespoons lemon juice
4 tablespoons plain yoghurt
2-3 tablespoons chopped fresh herbs – mint , parsley and either fennel or dill
Salt and pepper

Blend together the avo, mustard and lemon juice. Stir in the yoghurt and the fresh herbs. Season with salt and pepper. If you prefer to make this dairy free you can leave out the yoghurt and just use 2 tablespoons of water to let down the dressing to the right consistency.

For the potato salad
1 kg potatoes, boiled in their skins then peeled
4-6 small gherkins chopped
4-6 tablespoons finely chopped fresh herbs as above
Salt and pepper
Serves 6

This is my second entry for the challenge, my first being a delicious chocolate avo parfait, which we finished off today after our braai, alongside some wonderful guava parfait. All in all a wonderful Sunday lunch on a beautiful winter’s day, sitting around the braai while the old man snoozed in the sun and the youngster played in the grasses.


Disclosure: I developed this recipe to enter into the Afrikado challenge. There is a prize for the winning recipe which will be decided by a panel of judges. I received no remuneration for writing this post and bought all the ingredients myself.

Monday, July 15, 2013

Aromatic Beef Pie Recipe

Week 2's Freshly Blogged challenge had many of us in a twitter . Of a generation that has never cooked with suet and grew up to regard any saturated animal fat with deep suspicion, it was a mystery. Even though my classic English cookery books have whole sections on suet puddings, I’ve never been tempted to try them out and had no idea where even to buy suet in South Africa.

In England I know you can buy packets of ready shredded, more anonymous suet, that doesn’t look like what it is – great lumps of fat taken from around the kidneys of the cow. After a long phone conversation with the friendly butcher at our local PicknPay, I managed to establish that we were talking about the same thing (his English and my non-existent Afrikaans didn’t quite stretch to the right vocab for suet) and I went in to collect it, great curvy lumps of white fat encased in a membrane. It was incredibly cheap, so not hard to see why it was a staple of those frugal English cooks of yesteryear.

Grating suet
The rest of the ingredients for the challenge were: a Knorr beef stockpot, 500g beef shin, a PnP soup pack of vegetables, star anise and white wine vinegar. We could add two fresh and one grocery ingredient and omit one ingredient from the list. I don’t know what you would have made, but I went straight for the perhaps rather obvious but delicious traditional beef stew with a lovely thick and light suet crust. The twist being the star anise.

I had no idea how the star anise flavour would work with the stew but hoped for the best. I added onions and bay leaves as my fresh and red wine as my grocery ingredient and left out the vinegar. And it worked amazingly well giving a rich and aromatic stew that the whole family ate and would happily eat again. Star anise is my new essential spice!

If you feel inspired to vote in the challenge here is my recipe on the Freshly Blogged site. And the recipe as posted follows here:


Aromatic Beef Pie Recipe
I’ve never cooked with suet before, but the English culinary and literary heritage is full of old-fashioned recipes that use suet: dumplings, steak and kidney pudding, jam roly poly pudding and of course Christmas pudding. It took no time to decide on a rich and aromatic beef stew turned into a  pie with a golden suet pastry crust. It would work equally well as individual pot pies or as one big family pie. Star anise isn’t a traditional English stew spice but it adds a mysterious extra aromatic that lifts the beef out of the ordinary without overwhelming the rest of the flavours. I complemented it with bay leaves to give some subtler undertones, and a good slug of red wine for richness.

Ingredients
For beef stew
600g beef shin
4 tablespoons flour
3 tablespoons olive oil
3 onions
1 PnP soup pack: 2 carrots, 1 stick celery, 1 small leek, 1 large tomato, 1 potato
1 tablespoon celery leaves chopped
1 Knorr beef stock pot
½ cup red wine
1 star anise
3 bay leaves
Salt and pepper

For suet crust
350g self-raising flour
175g shredded suet
Salt and pepper
Approx 1 ½ cups cold water to mix
1 egg, beaten

Method
For beef stew
Slice the onions. Peel and chop all the vegetables into bite-sized pieces.
Sift the flour onto a plate and season generously with salt and pepper. Turn the beef pieces in it until lightly coated.
Heat the olive oil in a frying pan and brown the beef in batches until browned on all sides. Remove into a casserole.
Put the chopped onions into the same frying pan and cook until starting to soften. Add the rest of the vegetables and continue cooking for 2 minutes. Add the vegetables to the casserole.
Pour the wine into the frying pan and scrape up any residue. Allow to bubble briefly and then add to the casserole. Add the beef stock pot, star anise, bay leaves and a good seasoning of salt and pepper to the casserole, then add warm water to just cover the meat. Bring to a simmer, cover with the lid and leave simmering very gently for about 3 hours, until the meat is tender and falling off the bones. Stir once or twice during that time to make sure it isn’t sticking or burning.

For crust
If using butchers suet, remove the thin membrane and grate the suet finely.
Sift the flour into a bowl. Add the grated suet and a seasoning of salt and pepper.
Mix well.
Add water a little at a time, until the dough comes together. It should have the consistency of a scone dough, quite soft but holding well together.
Roll out the suet dough on a lightly floured surface until it is about 1 cm thick and about 1 cm wider all round than the pie dish you will be using.
Note: Make the dough just before you are ready to bake the pie. It shouldn’t wait around long or the raising agent will not work so well.

Assemble the Pie
Remove the bones from the stew and break up the meat into bite-sized pieces. Put all the meat and vegetables into a 1.5 litre pie dish with a rim. The remaining liquid should already be quite thick and rich but if it is too thin you can reduce it now by boiling for a few minutes. Pour the gravy over the meat and vegetables to come just below the rim of the pie dish.
Cut the pie crust to fit the dish. Wet the rim of the dish with water and use the leftover 1 cm edges to make a raised edge around the rim. Carefully lift the rest of the crust onto the top and press down all around the edges to seal. Make a small hole in the top to allow the steam to escape.
Brush the top with beaten egg.
Bake at 190C for 25-30 minutes until the crust is golden and well risen.


Voters in the Freshly Blogged challenge get prizes too. Check out what the voters' prize is this week and then vote for my recipe if you would be so kind. Thanks!

Previous Week's challenge : My phyllo spring rolls recipe

Wednesday, July 10, 2013

Chocolate Avocado Parfait Recipe

I’ve always loved avocados. I remember as a teenager growing up in England the occasional visit to a smart restaurant, where I would always order an avocado cocktail as my starter (this was the early Eighties and at the time it seemed the height of sophistication!). Now many years and half a world away, the South African winter is a time of avocado plenty – they are luscious, ripe and affordable – no longer a special treat but an everyday pleasure.

So, when invited to take part in ZZ2’s Afrikado "More than just guacamole!" Blogger Challenge, I was full of ideas for recipes using avocados, anything but guacamole was the brief. Apparently the average South African only eats two avocados a year – how can that be possible?! And ZZ2 are asking bloggers to come up with exciting and inventive ways to use avos in a bid to encourage people to eat more of these delicious and healthy, super-nutritious fruit.

The first idea I was keen to try was to use avocado in a dessert. I’d tasted a wonderful chocolate avo mousse made by a friend and wanted to expand on that to create something along the lines of a chocolate ice cream. The following recipe is what I came up with: a decadently rich chocolate parfait with a hint of orange and coconut, so velvety smooth that you would think it was full of cream, when in fact there is no dairy whatsoever!


Chocolate avocado parfait recipe – dairy-free and healthy!
Ingredients
1 large ripe avocado
4 tablespoons good cocoa powder
1 tablespoon melted coconut oil
5 tablespoons syrup (I used golden syrup)
3-4 tablespoons freshly squeezed orange juice

Put all the ingredients into a bowl and blend with a stick blender until smooth.
Taste and adjust for sweetness.
Spoon into a bowl, cover and chill in the freezer for 6 hours until set but still soft enough to scoop easily.

This parfait is so rich that you only need a few spoonfuls each, so this amount would easily do four people, served with a scoop of fresh orange sorbet to cut the richness.

Alternatively use immediately without chilling, as a thick sauce to drizzle over vanilla ice cream.
If you leave overnight in the freezer it will set harder than is ideal for a parfait, so allow to soften slightly in the fridge for an hour before serving.

Notes: I used golden syrup as a sweetener, as that is what I had available, but for a healthier alternative use a good maple syrup or agave.
The quantities of syrup and cocoa needed will vary according to the size of your avocado, so taste, adjust and taste again!


Disclosure: I developed this recipe to enter into the Afrikado challenge. There is a prize for the winning recipe which will be decided by a panel of judges. I received no remuneration for writing this post and bought all the ingredients myself.

For more Afrikado avo inspiration read Colleen's Green Juice Recipe

Monday, July 08, 2013

Phyllo Spring Rolls Recipe

This has been a year full of food blogging challenges for me – first the Robertsons Spicemaster cook-off and now Freshly Blogged from PicknPay, where 50 or so bloggers are given a mystery list of ingredients and have to come up with an original recipe. It’s online, it’s over 11 weeks and the last three in compete in a cook-off at Taste of Joburg in September. You get to vote for your favourite recipes at the Freshly Blogged website and there are weekly prizes up for grabs, both for voters and bloggers, but three foodie judges decide who goes through and who is for the chop!

The first challenge had us all madly tweeting over the weekend as we trawled Cape Town’s PicknPay stores for the elusive garlic, ginger and dhania paste. I tracked mine down without too much stress along with the Findus Thai Wok frozen veg, the PnP phyllo pastry, orange and pineapple. We were allowed to omit one ingredient and I dumped the two-minute noodles, which I am deeply suspicious of as a form of nutrition, and added as my one extra ingredient peanuts. These easy phylllo spring rolls were what I came up with.

If you like the sound of them please vote for my recipe on the Freshly Blogged site! The recipe and inspiration as posted for the competition follow:

-----------------------

A palm shaded warung on a family holiday in Bali, serving crisp spring rolls with peanut sauce to dip into. My kids eagerly tucked into what were essentially parcels of exotic vegetables that they’d never even consider eating in any other format. It’s the delicate crispness of the roll that lures them to overlook all that vegetable goodness within.
 So when Thai vegetables and phyllo pastry were the main ingredients of the first Freshly Blogged challenge, it was spring rolls that immediately ‘sprung’ to mind: oven baked in phylllo pastry for easy cooking and with a pineapple and peanut dipping sauce inspired part by sweet/savoury fresh Indian fruit chutneys and part by the more traditional peanut sambals of Indonesia. These spring rolls are a creative (if not very  authentic) interpretation of a holiday memory of those Balinese spring rolls, possibly the only way of convincing my kids to munch through any amount of shredded vegetables. I hope your kids, and adults, will enjoy them too!


Recipe for Phyllo Spring Rolls with Pineapple and PeanutSauce

Ingredients

250g (half pack) of PnP phyllo pastry

For spring rolls
500g Findus Thai Wok frozen vegetables
2-3 teaspoons PnP crushed garlic, ginger and dhania
2 tablespoons vegetable oil
2 tablespoons fresh orange juice
Salt and pepper

For sauce
1 cup chopped fresh pineapple
1/3 cup salted peanuts
1 teaspoon PnP crushed garlic, ginger and dhania
1 ½  teaspoons dark brown sugar
1 teaspoon vegetable oil
Salt and pepper

Makes 12-16 rolls

The night before you plan to cook these, put the frozen phyllo pastry in the fridge to defrost. Take the packet out of the fridge the next morning two hours before you plan to use it to bring to room temperature, otherwise the sheets will stick together..

Make the sauce by putting all the ingredients into a mug and processing with a stick blender until smooth. Check seasoning and adjust to taste.

Heat your wok until piping hot, add the 2 tablespoons oil, it should be just starting to smoke. Put in the garlic, ginger and dhania paste, immediately followed by the frozen vegetables and stir quickly together. Add a squeeze of orange juice and  stir-fry for 5-7 minutes until the vegetables are starting to become tender but still retain some crunch. If there is too much liquid in the bottom of the wok, drain it off. Leave the vegetables to cool before making the spring rolls. Refresh them just before using with another squeeze of orange juice.

Pre-heat the oven to 190C.

Take one roll of pastry from the packet. Unroll it carefully and cut it into three strips of approximately 12 cm wide. Take one piece of pastry and cover the rest. Put a spoonful of cooked vegetables at the narrow end nearest to you. Fold the sides in over the filling by 1 cm and roll up around the filling. Brush with oil to seal at the end and brush the whole roll with a light coating of oil. Place on a baking tray and continue to make the rest of the rolls. If you prefer thicker, more sturdy rolls use two sheets at a time.
Bake for 15 minutes until the edges are golden and the rolls are crisp.
Allow to cool for 5 minutes before serving with the pineapple and peanut sauce to dip.


-----------------

I’m busy creating a recipe for the second Freshly Blogged challenge already, which I’ll post here next week, then I hope to stay in for at least a few more rounds (or even right to the end!) as I’m enjoying the stimulus of coming up with new things every week!

Please vote for this recipe here - I'd very much appreciate it and will love you for ever!

NB for my non-South African readers: dhania is coriander/cilantro.

Tuesday, July 02, 2013

Mildly Spiced ‘Persian’ Bean Soup Recipe

At the end of last term, our girls were performing a Persian play at school. Parents were asked to provide food with a Persian flavour; it being the middle of winter, soups and breads were suggested.  Now Persian suggests to me richly woven carpets, rosewater and perhaps jewel-like pomegranate seeds, sorbets, sherbets and such-like delicacies. I’ve obviously been reading too many fairy-tales!

For a more down to earth perspective and less daunting challenge, I turned to my trusty Madhur Jaffrey book, which includes recipes from the Middle East, Iran, Turkey and Japan, as well as India. I found several recipes that sounded good, featuring mild spices and many pulses, poor man’s Persia perhaps. In the end I created a soup inspired by elements from several recipes and added my newly favourite spice combo – garam masala. I’ve recently fallen in love with its aromatic and gentle spiciness having ignored it on the shelf for years, so it deserved a starring role for once.

Here is my final recipe, first tested at the girls’ play, then at our Midwinter Festival, at both of which events it disappeared very quickly. It finally managed to get photographed today after being served up for Middle Daughter’s 13th birthday lunch. Perhaps it doesn’t sound very birthday-ish, but she has planned  a birthday tea with chocolate cake and cheese biscuits, shortly to be followed by a braai fire with boerewors, stick bread and marshmallows, so a lunchtime healthy soup sounded like a good foundation for the feasting to follow!

It’s simple to make, filling and warming and goes down well with all but the most ardent vegetable refuseniks.


Recipe for Persian-Inspired Bean Soup
500g dried haricot or other small white beans
2 onions
1 clove garlic
2 tomatoes
2 potatoes
2 tablespoons olive oil
1 ½  teaspoons cumin
1 ½ teaspoons garam masala
½ teaspoon turmeric
Salt and pepper
2-3 teaspoons lemon juice

Soak the beans overnight in plenty of water. Rinse and then put into a pot with enough water to cover the beans by 2 cm or so. Bring to the boil and simmer for an hour.

Chop the onions and garlic quite small. Chop tomatoes and potatoes into small cubes.
Heat the oil in a frying pan and add the onions and garlic. Cook until starting to soften. Add the spices and cook stirring for a minute. Add the tomatoes and then the potatoes, stirring well to coat everything.

Check the water level in the beans. It should just cover them. If there is too much water, remove the excess. Now add the contents of the frying pan to the beans, season with salt and pepper and cook for another hour, until the beans and potatoes are very tender. Check for seasoning. At this stage it can be left and reheated later.

Just before serving, add the lemon juice to taste. Don’t be tempted to leave this out, as it really lifts all the flavours to a new dimension and adds a lively touch.

--------------

I’m taking part in the PicknPay Freshly Blogged SA bloggers competition, which started last Friday and will be carrying on for 11 weeks, with 5 people being eliminated each week and a grand finale cook-off for the last three in September. It’s a Masterchef mystery box style challenge where we are given set ingredients and have to come up with a recipe. I’ll be publishing my first recipe here very soon, which I’ve submitted to their site today. The deadline for our submissions is tomorrow and the Freshly Blogged site goes live on Monday, when you’ll be able to vote for your favourite recipe. (Hint - mine is delicious!)  It’s  been great fun, stimulating creative food thinking, so I hope to stay in for as many rounds as possible, and there’s plenty of worthy competition among all my fellow SA food bloggers!

Our list included Thai frozen vegetables, phyllo pastry, garlic, ginger and dhania paste, 2-minute noodles, a pineapple and an orange... we were allowed to omit one ingredient and add one ingredient of our choice... what would you have made?

Saturday, June 01, 2013

Salt

Natural sea salt


 “He’s the salt of the earth” 


Salt has been the most essential addition to our food for thousands of years. It was valued and, in some eras, so prized that it attracted heavy taxes, making it too expensive for the common man to use every day, which is why even today, when the salt tax is long gone, much of Italy still bakes its bread unsalted, having acquired a taste for it more than a hundred years ago.  Salt has always been so much a part of our food heritage that it is a little strange that it has become today’s scapegoat of the food world. Fat is back, butter is once more safe to eat (did you ever switch to marg? I certainly didn’t!) but salt is now the demon.

The biggest part of the problem lies with packaged and processed foods and a fast-food culture that relies too heavily on them. Salt is a fantastic preservative, so tends to be used quite heavily in complex foods with a long shelf life.  It’s all too easy to eat too much salt and that can result in health problems such as heart disease and high blood pressure. Another problem is that our taste sensors build up a tolerance to salt, so that if we get used to the taste of a certain amount, any less tastes bland. We end up adding more salt to our food than is good for us. But ruling out salt altogether isn't the answer. Our bodies need salt to function properly, ultra low sodium diets can cause health problems just as much as  diets too high in sodium.

I think I add just the right amount of salt to my cooking. I add to my own taste levels...  my husband’s taste buds are differently calibred and he tends to add salt at the table. I’ve noticed that the children are following suit, our son in particular being a little too lavish with the adding, so when I got an email from Nestle mentioning a Salt Awareness week and offering to send me the ingredients and their recipe for a low salt but tasty meal I thought this would be a good thing to try out.


Expecting some new low-salt products and seasonings, I was a little taken aback when their box was delivered to find packs of stew granules, Worcestershire sauce and 2-minute noodles alongside some flavoured evaporated milk cook-in sauces. It was as if the person packing the boxes hadn’t got the memo that this was a low-salt challenge. The ingredients list on the stew granules was headed up by salt, which didn’t give me much confidence in its health credentials. However it did result in my salt awareness jacking up a notch, as I dug out the magnifying glass, scrutinised the labels and started doing calculations in my head for daily salt allowances. 

The recommended upper limit of sodium per adult per day is 2300mg, equivalent to one teaspoon of salt.

The stew granules had 4600mg of sodium in a 30g packet, intended to go in a recipe to feed four, so basically that is half your entire daily salt allowance used up in one dish. These were intended for the butternut and lentil bobotie recipe, so I gave that one a miss and went for the beef stroganoff, which actually only had two packaged ingredients, the Worcestershire sauce and the mushroom flavoured evaporated milk, both of which were fairly reasonable in salt content.  The cook-in milk came in at 140mg per 100ml serving which puts it just into the official low-salt category and the Worcestershire sauce has 119mg per 10 ml serving.  For the recipe provided this added up to 707mg of sodium in total, giving about 176mg per person if no extra salt is added, which is much more reasonable. To give Nestle their due they had also sent a voucher to purchase the fresh ingredients for the recipe, so I had some lovely beef fillet, red peppers and mushrooms and parsley lined up on the counter.

However, at this point I started to have a logic problem with this exercise.  Normally when cooking a recipe like this from scratch with fresh ingredients I would probably only use about 1/3 teaspoon of salt anyway. A little seasoning in the flour dusted on the meat, a couple of twists of the mill over the whole dish as it cooks and a quick check at the end to correct the seasoning to taste... to my taste that is!

“Take it with a pinch of salt”

And I have to confess to being a food snob when it comes to packaged sauces, so I was already having doubts about smothering luscious fillet steak and fresh peppers and mushrooms with something out of a tin. Why use a ‘mushroom flavoured’ sauce (containing no real mushrooms) in a dish that already has mushrooms in? I tried to stick with the recipe, I really did try, but I just couldn’t bring myself to pour the stuff on. This was supposed to be our family supper after all. I decided to split the dish at the point when the sauce was added and try one part with the cook-in sauce and one part with sour cream, as is more traditional. The two tablespoons of Worcestershire sauce in the recipe seemed outrageously overpowering to me, so I reduced the amount considerably.

I went ahead and cooked the meal and we all enjoyed the treat of tender fillet steak strips, but I have to admit that the dish as a whole was a compromise. The cook-in sauce version, I imagine, would have tasted fine to those who like to use packets of mushroom flavoured soup in their recipes, but needed the whole amount of Worcestershire sauce to give it enough salt, which would have completely overwhelmed the rest of the spices and the meat itself. The version where I used cream instead of the sauce ended up being bland because I hadn’t added any real salt during cooking and there wasn’t the salt from the cook-in sauce to compensate. I would have been far better off from a low salt point of view just cooking from scratch with only fresh ingredients and using judicious pinches of natural seasalt as I usually do.

So as a salt awareness exercise it was in a way a success – it made me think, scan labels more critically, and it made me even more determined to cook from fresh, use salt wisely and in moderation.  However as a taste test it failed completely. It did nothing to make me want to buy or recommend any of the products ever and I still can’t understand why 2-minute noodles and very salty stew granules made it into a press pack for food bloggers for a salt awareness week. No food blogger worth their salt is going to be thrilled with receiving these products. I’m feeling more than ever cynical about big brands disguising  (not very subtly) a product promotion as a health drive . The best thing they could do for everyone's health is take 2-minute noodles and stew granules off the supermarket shelves altogether.

Three different sea salts
Three salts in my kitchen: KhoiSan sea salt, Khoisan seaweed salt, FalkSalt seasalt flakes with chilli

If you want some more facts about salt here’s a 2009 report on salt usage from Harvard.

And my salt aware path forward?
Continue to cook with fresh foods, avoid processed foods even more and check labels, check labels, check labels!
Use a good unrefined sea salt. When I switched to using KhoiSan salt from regular table salt several years ago, I found that I needed far less salt to get the same intensity of flavour. Plus there are no artificial additives and chemicals so it’s healthier in every way... as long as you use it in moderation of course!

What are your feelings on salt? Do you have a favourite cooking salt in your kitchen?

Sea salt
Natural sea salt crystals like jewels

Sunday, May 26, 2013

Re-visiting Recipes – Pasta with Tuna, Rosemary and Balsamic Vinegar

Recipes that we know off by heart have a habit of morphing over time. Evolution, perhaps improvement , or just plain forgetting an ingredient and substituting something else. The results may be just as good, but it’s refreshing to go back and re-discover their roots, sometimes finding that the earliest version had a clarity of flavour that has been lost in the passing of time.

This happened to me when I stumbled upon my recipe for pasta with tuna, tomato, rosemary and balsamic vinegar.

Regular readers may have noticed that I’ve been fiddling with my blog. I have been positively prehistoric and still using Blogger’s original html template. Finally the urge to play with all those clever gadgets got to me and so yesterday I summoned up all my courage and started switching it over. Several hours and much cursing and panic later I’d got something that looked as close as possible to before only with fun shiny gadgets in the sidebar, like the Popular posts feature recommended by Blog Hangout.

There was only one problem. Most of my popular posts, it seems, are from way back in 2006 and 2007 believe it or not, before I was routinely posting images with my text. So those thumbnails weren’t picking anything up. It no longer looked shiny and clever but ragged and unprofessional.  I quickly added an image to my rusk post from my files, but the balsamic vinegar pasta post still had nothing. So that’s what we had for supper last night.

Re-reading my recipe I found that I’d changed several things over all the years of this being a staple weekday recipe, and not necessarily for the better. The original kept the tuna separate from the tomato sauce, whereas I’d taken to mixing it into the sauce. There was more balsamic vinegar than I’ve been adding recently and more olive oil. I made it strictly according to my own instructions and was pleasantly surprised; the flavour was at once mellower and  more distinct, the tuna keeping its own identity and less swamped by the tomato. So now I am resolving to go back and cook some more of my staples from the original recipes, just as a reminder.

Here is the recipe from 2006 (photographed in 2013!)


Pasta with Tuna, Tomato, Rosemary and Balsamic Vinegar
For 450g/1lb pasta
8 tablespoons olive oil
3 or 4 cloves garlic
2 sprigs rosemary
450g/1lb tinned tomatoes, drained and chopped
2 teaspoons balsamic vinegar
1 tin of tuna drained

Put the olive oil, thinly sliced garlic and rosemary sprigs in a frying pan over a medium heat. When the garlic starts sizzling add the tomatoes, with salt and pepper and cook for 10-12 minutes.
When the pasta is just cooked – really al dente – drain and put back in the pan and toss with the sauce over the heat for 1 minute. Add the tuna, stir, then off the heat stir in the balsamic vinegar and serve immediately.

Oh and all the children liked it back then and still seemed to like it pretty well now, so that's a triumph in itself!

I’m gradually getting used to my new blog look, though not completely past fiddling some more with it. I may even make an even bigger leap one of these days and migrate to Wordpress, but for now let me know what you think? Are there any other features I should add? Is it easy enough to read and easy enough on the eye?